Wednesday, December 26, 2018
Bonnie Hunter Good Fortune
I have been fortunate to have been the recipient of a stash of fabric. Colon cancer took the life of my sister-in-law but due to the generosity of my dear brother I was the recipient of the stash. Most of it I would characterize as woven or home spun. It was definitely Becky style. The majority of the fabric I selected for this quilt are plaids. I did use the paint chips to select my fabrics but now that I have sewn a few of the clues, I have noticed that my patches are not as bright and bold as the color samples even though the colors look to me to be like the paint samples. I wonder if I am going to be disappointed in the result. I think it may be much more subdued. I am using orange prints because I did not have orange plaids in the stash so that will either brighten up the quilt or look like it does not belong. That is the fun of mystery quilts. We will see what we will see. I remember my first log cabin quilt. I had so much fun rearranging the blocks and was so surprised at the results. That was great fun. On to clue 3. I have die cut the rectangles and the half square triangles to make the chevron blocks and the bonus blocks. I hope my plan works.
Saturday, December 22, 2018
Bonnie Hunter Five my way
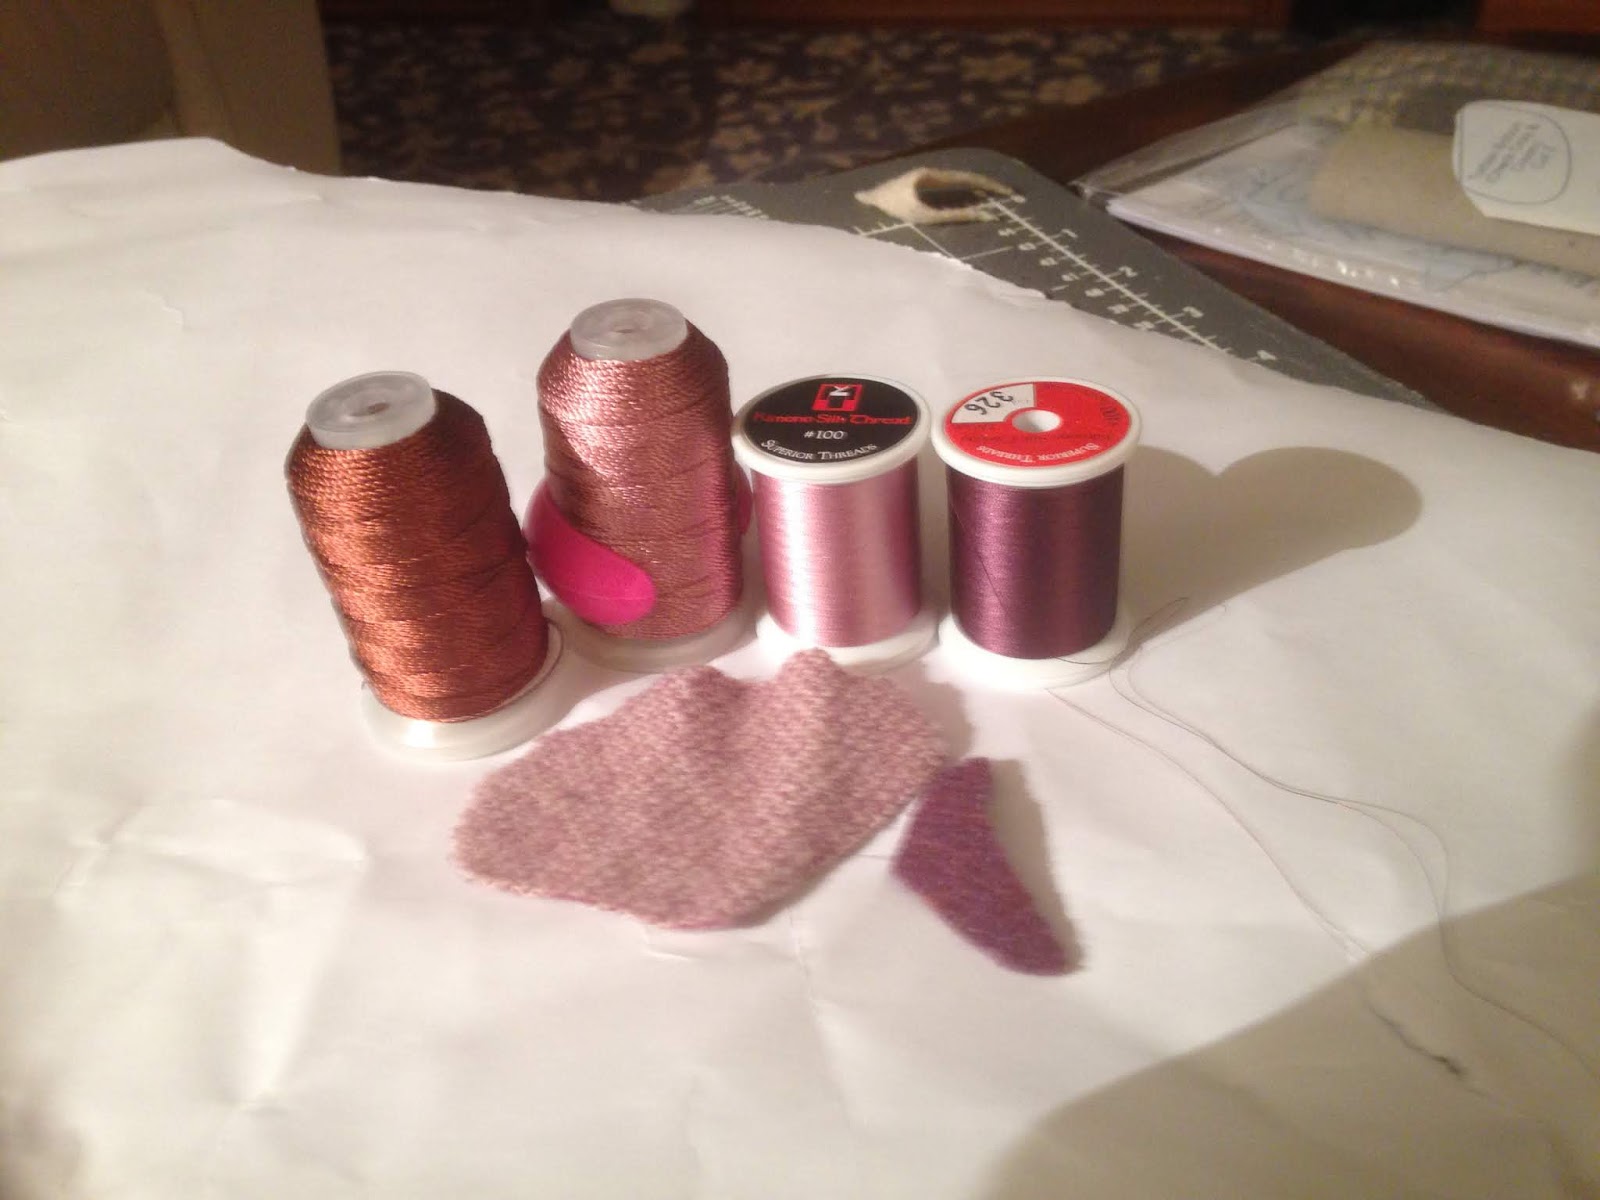
I was going to work on Clue #3 but decided to download Clue #5. I still had my blue fabric out and about so I decided to skip to Clue #5. I had pulled oranges from my scrap box so that was also handy just waiting for my on a book case. I was rifling through some other oranges I had previously selected and noticed my hand painted samples that I had done in a dye class from year's back.

I decided I would cut them up for Clue # 5.

There is far fewer needed of this kind then the others so I will start working on this tomorrow. I need some blue cut into strips and I am ready to piece. Fun with mystery quilts.

Friday, December 21, 2018
Bonnie Hunter's Good Fortune Mystery


Tuesday, December 4, 2018
Gina Perkes Ruler Mastery Class
I first posted about this project the end of last year... December OMG Bonnie Hunter Mystery 2017-18 I had watched thequiltshow.com and learned about Gina Perkes Ruler Mastery Class in one of their excellent shows. I ordered the rulers and looked forward to participating in the class. I reviewed the material and realized that the block sizes and quilt size were nearly consistent with my sister's unfinished quilt. After deconstructing and reassembling the quilt top with a new back, I set about working through the 10 month video class.


Here is the finished quilt. It is about fifty inches square. You can see the quilting better on the other side.

I have to wash out the water soluble thread that I used to baste the quilt and bury some errant threads that may appear after washing. I should make a label to tell this quilt's story. I am giving it back to my sister. She and her husband have a timid black shepherd that might like it for a dog bed. I remember when I would love making quilt tops and the only thing I knew to do with them was to tie them. My mother taught me how to do that after she had taken a class from Eleanor Burns forty years ago or more. This was when Eleanor was self publishing her materials. I fell in love with log cabin quilts. I loved moving around the blocks until I decided upon a layout. Then I went on to Amish quilts. All the while I would tie them. Now I enjoy the quilting as well as the piecing. On to my next project.
Addendum:
I washed the quilt and all the water soluble thread dissolved and all these really puffy spots showed up. I understand the notion of even quilting much better after this. This quilt needs to be blocked but that is not happening. Maybe I get out an ironing board and steam while I look over the quilt for threads that need burying. I think I need to work center to edges or top to bottom rather than randomly here to there. I look forward to giving it back to my sister. I learned a bunch about what not to do. I am not a negative Nancy. I learned I can do so much and I love quilting.


Tuesday, November 27, 2018
Stitchin for Christmas

Friday, October 12, 2018
Skills- Use them or lose them
I have not been keeping up with my OMG posts just as I have not been keeping up with some sewing skills. My mother and I were invited to my niece's husband's birthday party. My mother asked my sister for ideas for a gift and my mother and I went shopping. I found a chef's apron and some other grilling tools. After they arrived, my mother suggested that I do something to personalize the apron. I have not used my embroidery module but thought I was up to this endeavor. I created a design that I quite liked. This took a few days because I totally forgot how to do any of it. The manual does show you how to attach the embroidery module to the sewing machine but the manual has bare bones information on usage. I went online to watch some how-to videos to create a design. In my first attempt I copied the file from the software on to a USB drive to attach to my sewing machine. The sewing machine did not recognize the file. I fumbled around and tried resaving in different fashions until I finally remembered that I had to convert the file to a different format using the software. I forgot I was supposed to push the sewing machine icon. Software is all intuitive these days and my intuition often fails me.


I stitched out a sample with a thread I contemplated using. It is a Superior Fantastico variegated thread of reds, oranges, yellows and blues. I thought of these as flame colors ergo appropriate for the project. I found a fabric that was nearly black for my test sample.

Mom and I agreed that the bottom words were too small and not readable in the stitch out so I went back to the drawing board.

Then I made the next stitch out.

I was satisfied with it and passed it by my mother for her stamp of approval. We discussed some possible edits but we went with the above design. I hooped the ready made apron in my medium hoop and began the final stitch out. When embroidering one sits at the sewing machine and watches the stitch out in case anything goes wrong( or change thread colors and all those other things people do with this process). I was watching Thursday night football and working on Sudoku puzzles. Sheppard's Grill and Flip had been stitched when I noticed that I had misspelled Flamin'. Oops. Panic time. I decided I would wait until it stitched the end of Flippin' until I pushed the stop button. I took the USB drive out of the sewing machine and put it back in my computer. I went to edit the design on the computer only to discover that in the time that I spent watching the beginning of the stitch out, the original file did not save properly. There was an exception error when I tried to open the file in the software. I had to recreate it again. This is harder than one would imagine because I had no idea what the exact height and width of the components were. I could only approximate which makes repositioning a problem. When I went to continue stitching, I touched the screen at the beginning of the Flamin' and the needle went chachunk chachunk and moved just to the left of Flippin' and started stitching on top of the existing word. Panic time again. I pushed the stop button after four or five stitches. I tried several different things including moving the hoop by changing the width and height coordinates. None of those things worked. OH NO OH NO OH NO! What to do! What to do! I kept pushing different buttons on my sewing machine. I do not know what icons I pushed but the combination showed the stitch count on the screen. I remembered that I used that stitch count to position the needle on another project a long while back. I started guessing numbers to position the stitch count to get the needle to the end of Flippin'. After half a dozen or so guesses I got the correct number. I pushed to go button and lo and behold it started stitching Flamin' under Flippin'. The word were stitched out and then the program went to stitch out the swoosh under Sheppard's Grill. The stitching starts on the lower right. It was Panic time again because it was stitching it closer than it should and I was worried that it would not fit the whole time. The lower right ended up stitching out touching the bottom of the capital S. Phew. I thought I was going to need to pick out that section and rehoop or something to get it positioned correctly.

Here is the stitching on the apron. I hope they enjoy the gift. I enjoyed making it despite the trials and tribulations. I am so happy that I actually remember how to do some of this stuff because I plan to use my embroidery module to applique a Rose of Sharon quilt soon. I guess I need to do some things more often in order to get my hippocampus to lock things in the long term memory of my brain.
Friday, August 3, 2018
August OMG Finish

Here is my block all finished. My August OM goal is met. Now I can flit about to this and that for the rest of the month. I will edit this post and hopefully I will have some more finishes or progress to report.


I learned that "Milliners come in sizes 1-10, with 1 being larger and 10 being finer. They can also be found in sizes 15 and 18, with 15 being larger than size 18, and 18 larger than size 1. Confusing? Yes. I have no idea why they are sized that way." I learned this from Mary Corbet's Needle and Thread.

Come join in the fun at Elm Street Quilts and make your own monthly goal. Get encouragement from the other participant's and see what other are doing. You will be inspired.

Thursday, August 2, 2018
August OMG

While home last month I went through my collection of Lynette Anderson fabric and kitted her Chateau Hexagon wall hanging pattern. The remaining fabrics can now be released to be used in whatever manner I choose. Therefore, I intend to start doing a Block a month. I am working on Block 6 this month. I am using Pellon SF101 as a stitching stabilizer. I have selected my DMC that I am using to substitute for the Cosmo floss. Now I am off to start the embroidery.
Additionally, I will continue to work on Gyleen Fitzgerald's Graffiti Quilt. I hope to get back to my Quiltmania Round the Garden quilt but I may quilt my Callendula Patterdrip quilt. I am mixing it up this month.
Tuesday, July 31, 2018
July OMG Finish


My first dog was just too big. I wonder if my second is too small. Hmmmm???
My next concern is to understand proper attribution of one's quilts. I drew my pictures after looking at a number of line drawing. The fox is based on a felt mask of a fox, a line drawing of a jumping fox and the feet came from a coloring page version of a fox. I put them together in a drawing and made my appliques. The dog is a drawing I made while looking at a line drawing. I originally planned to paper piece it so I drew it using all straight lines. I changed my mind after them making the drawing of my second version of my fox. I drawings are not really original. They are cobbled together from other peoples stuff. They are definitely derivatives. I am not sure what is kosher. Any experts out there?
Tuesday, July 3, 2018
OMG almost completed.


My new ruler broke after I had completed about two thirds of the quilt. I taped it together and continued. I was very nervous about using the broken ruler because my sister has had to send 2 of her sewing machines in for repair to the timing mechanisms due to misadventures in quilting. I tried to be very careful but I would not recommend you do what I did. My impatience ruled the day and I chose to continue.

My next problem was the threat of running out of the discontinued thread I had chosen to use. I choose to quilt from the center blocks in rounds so that if I were to run out I would come up with a new choice for the corners of the quilt. The white core was peaking out when I had the sixteen blocks on the corners left. I decided to leave out the center quilting of the blocks until I knew I had enough. I went back and quilted the centers. Then I switched from the Superior ⇲35 weight Lava variegated thread to a Superior Art Studio 40 weight blue thread for the setting triangles. I have used this cone over and over. I will probably use the rest for applique. I will miss this thread. I have so much thread it is nice to pare down my thread stash along with my scraps.


I do not seem to be able to finish my goals on time recently so this will be my OMG but I will also try to complete a Gyleen Fitzgerald Grafitti Mystery quilt.
Thursday, June 28, 2018
On Ringo Lake update


Friday, June 1, 2018
May OMG
I have not been posting to OMG but I have been busy with quilty stuff. I have finished On Ringo Lake top and now I have just finished piecing a back for it.

 The back is an asymmetrical pattern. This way I do not have to worry about lining up the front and the back. I need to remember that for future backs of quilts. The top is set on point and the back is straight set. I wonder how that will sandwich.
This month I intend to sandwich and quilt and bind this quilt. Then I can get back to my Gyleen Fitzgerald Mystery Quilt.


Friday, March 30, 2018
On Ringo Lake CONFUSION

I had six blocks done so I decided to add the sashing as I went along. In the past I have just added the sashing to the top and left of all the blocks and then just sewed the rows together with the sashing already attached. Well that obviously did not work. Every other one is upside down!!! I did not get that. I remember reading a post a months back. They were way ahead of me. Anyway ....I have this directional confusion disability that interferes at times and I did not understand what that post meant. Now I get it. Wrong... Wrong...Wrong am I. I'm glad I figured it out before I did all of them that way.
OMG March Finish


This was so much fun. I used a panel from my stash that I bought at a local quilt show. I encourage attending the local shows and supported the local vendors. I need them to stay in business. The show had a few local vendors. I bought some hand dyes from one and the panel that I cut apart for this quilt from another. I also made the changing mat that is on top of the quilt. I used a free pattern that I changed up a bit.

I Used a piece of fleece lined vinyl and decided to use very little quilting to join it to the top.

The pocket at the bottom holds the wipes and diapers. It folds up with a strap closure.
I also am working on making the Bonnie Hunter Blocks for On Ringo Lake. I feel good about my finishes since I was away from home quite a bit this month,
Come join in the fun at Elm Street Quilts and make your own monthly goal. Get encouragement from the other participant's and see what other are doing. You will be inspired.
 |
| ElmStreetQuilts |
Monday, March 5, 2018
March OMG


Wednesday, February 28, 2018
February OMG Successes

I have started on my English Paper Pieced Brimfield Blocks . The plan is to make a Grinchie baby quilt. My problem is how to incorporate the panels into the quilt. I have worked out a pattern for the tree blocks between the Brimfield blocks but the solution for the panels has not come to me yet. I will probably incorporate them in a border somehow, but I am not happy with my first efforts. Meanwhile a baby shower is being held Next month so I need to come up with another quilt. I have the top underway. I also finished washing and folding the last of the fabric from my sister-in-law. And have begun to catch up on my mystery quilt.
My successes include:
1. Creating my own design using Brimfield EPP pieces.
2. Fabric washing, folding and sorting.
3. Designing a quilt to be made from the Elizabeth Hartman Blocks and Gyleen Fitzgerald Blocks.
4. Catching up on Gina Perkes Mastery Ruler Class
5. Designing a baby quilt from hour glass blocks and fabric that I cut up into panel sections. I also have a quilting plan that includes trying Batist Fan rulers and clamshell rulers.
Come join in the fun at Elm Street Quilts and make your own monthly goal. Get encouragement from the other participant's and see what other are doing. You will be inspired.
|
| ElmStreetQuilts |
Sunday, February 25, 2018
BabyQuilt from Kismet to Willy Nilly

Friday, February 23, 2018
Baby Quilt Progress Kismet be my guide

I have created my quilting plan after watching some Craftsy classes for inspiration. That was fun. One thing I learned while watching one of the courses was to let Kismet rule the day. What a wonderful freeing thought. Don't worry about your quilting decision, just roll a die or flip a coin and see what happens. In my case I decided that I wanted to use rulers to make a spinning design in some of the blocks but not all. I have 71 hourglass blocks and I thought I would like about 25% of them to have the spinning flower design. I numbered them from 1 to 71 and then used an Excel spreadsheet to generate random numbers from 1 to 4. Any block with the number 1 would be a flower and the others would be other designs. That was fun. It took all the worry out of the process.
I got out my quilting rulers and fiddled with them till I decided that I wanted to make 5 pinwheels and some blocks with one of my new Gina Perkes rulers that I think resembles leaves. I have flowers and leaves and pinwheels on my quilt design.
I do think that my pinwheel blocks may not "spin" because my peach and tourquoise hour glass blocks are too close in value. I decided to see if I could get the quilting to help it spin. I am heavily quilting the peach parts and stitching around the blue/green parts. I am using my HandiQuilter ruler to help with the straight line quilting, two clamshell Westalee rulers (one from the sampler pack and another from my new mini fill pack). I quite like working with rulers. It works just fine on this baby size quilt. I think for bigger quilts I would use my Tiara rather than my Bernina.
 I stitched in the ditch up on side of the blue triangle. I used the handiquilter ruler as a stopping point marker for my ruler foot.
 I abutted the clamshell ruler to the handiquilter ruler for placement then removed the handiquilter ruler so I could stitch three clamshells across the top of my triangle stopping at the seam and not finishing the last one.
 I kept the needle down and snugged a medium clamshell mini fill ruler around my ruler foot. I stitched round the clamshell until the needle rested in the seam at the other end of the ruler and then slid the ruler down the seam line and snugged it back around the ruler foot again. Easy Peasey. I made clamshells until I got back to the center and repeated the steps for the remainder of the pinwheel.

 I used a variegated 35 weight thread for my flower blocks. The tension is not quite right, I used Superior's microquilting thread for the rest of the quilting. I think it looks great.
 Here it the bat looking from the backside.
 Here is my pinwheel. Fronside.
 And backside.
 Here is my star from the back
 My leaf parts.


I used my handiquilter ruler with its handy 1/4 inch lines to add straight lines to the peach triangles. I was thinking that the extra quilting would make the blue parts pop up so the blue/green parts would dominate. I don't think that worked but I like the result well enough and the pinwheel parts add variety to my quilting plan.


and my tension problem flower. Have fun quilting. I am thinking 4 days to finish the quilting and another 2 for the binding and it will be a quilt. We will see if my prediction happens.
Subscribe to:
Posts (Atom)